Grouping Multibox links in posts.
Since v4.0.0.507 new setting for the blog is added: Grouping of Multibox.
Enabled by default (to keep previous blog multibox handling), this option can be found in the Online Administration section of the blog, Settings tab.
When this is enabled, all element that have multibox and are from the same type * will be grouped into same box with navigation to loop among them.
When this is disabled, every multibox element will pop-up in separate box and no navigation among the other similar elements will be possible.
*Different types of multibox elements (image thumbnails, pure links, etc) are grouped separately from each other by the multibox handler. In other words - you can put both thumbnail and a link into same box and navigate through them.
Multibox for images added in the online text editor
When you add posts in Blog or products in the Shop, you add images in the online editor.
In some cases you may need to apply multibox effect to these images.
Here are the steps to achieve this:
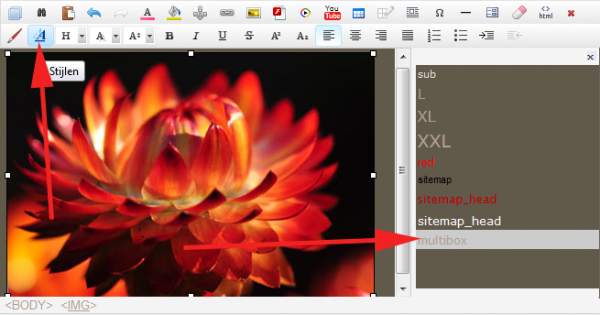
A.) if you are using Innova Editor:
- Insert an image
- Select the image (added in step 1) in the editor
- Click on Styles button to open style sidebar
- Apply style: multibox
- Set the image as hyperlink and link it to some other image (image you want to display with multibox effect)
B.) if you are using Tiny_mce Editor:
- Insert an image
- In image properties dialog, select "appearance" tab and select class "multibox"
- Set the image as hyperlink and link it to some other image (image you want to display with multibox effect)
This is applicable to Blog, Podcast, Shop, catalog and Online Editable page (not to normal pages with editable macros)